
How to Integrate Partner and SSPs in IngeniousPlex?
In order to integrate any given SSPs, you must have access to the admin login. Find the next steps mentioned below.
Step 1:
- Before adding SSPs, you will be required to add partners, for that, go to Partner Management from the left navigation bar and select Partner List.
- Now scroll down a bit and you will see a button called Add New Partner to the right, click that button. (image 1)
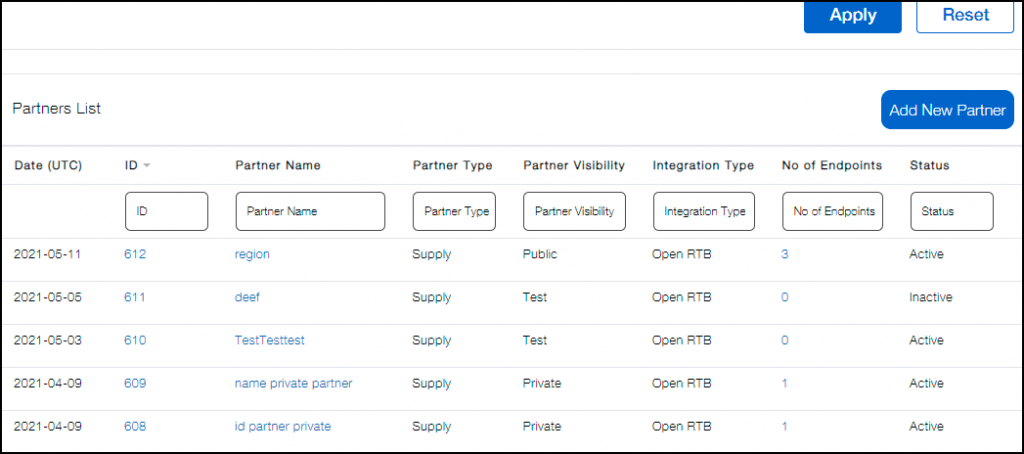
Image 1
Step 2:
- Upon clicking that button, a new window will appear wherein you will be required to fill the asked details. Add the Partner’s Name and the Point of Contact.
- In Partner Type, select Supply. In Partner Visibility, choose whether it’s public, private, premium, or test.
- Public refers to the tier 2 & tier 3 partners whereas Premium implies the tier 1 partners. Adult, offsene traffic is referred to as Private. Test partners are used to check if the Partner and their respective ssp is properly working or not.
- Now go ahead and choose the integration type as Open RTB. In Display Type, choose whether you want to see the partner ID or name in the SSP list.
- Select the Status and Default Ad Serving Domain. This is the URL that will be viewed to the SSPs. This URL will be applicable to all the media channels.
- Custom Ad Serving Domain URL that you will select here will be overridden by the Default Ad Serving Domain in case of Image type. (Image 2). However this is not mandatory.
- Then click Submit.
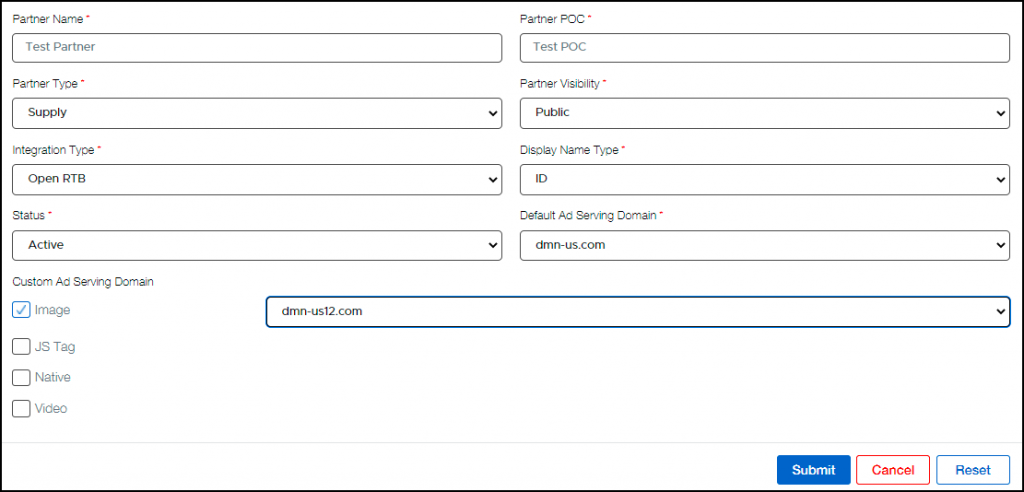
Image 2
Step 3:
- Now that you’ve created the Parner, go to the SSP Endpoint List under Partner Management from the left navigation.
- Add the Partner Name that you just created and give a name to the End Point.
- Select the Data Centre that is in active state, this will need to be communicated from the team at Vertoz.
- Select the Media Channel, Status, and Revenue Calculation.
- Revenue Calculation is basically choosing on what basis the SSP is going to charge, this will be informed by the Partner itself.
- Enter User Sync URL if applicable.
- Next, QPS is Queries Per Second. This information will be provided by the SSP as to how many queries per second will be sent by them. In case the value mentioned here is 1000, if the SSP sends 1500 QPS, 500 will be discarded and only the mentioned value, i.e. 1000 QPS will be accepted.
- Now click submit and your SSP endpoint is created.
- Once SSP is created. Edit the same SSP and you will get the SSP endpoint and API URl. You can provide these endpoints to the respective Partner and start their traffic at our panel.
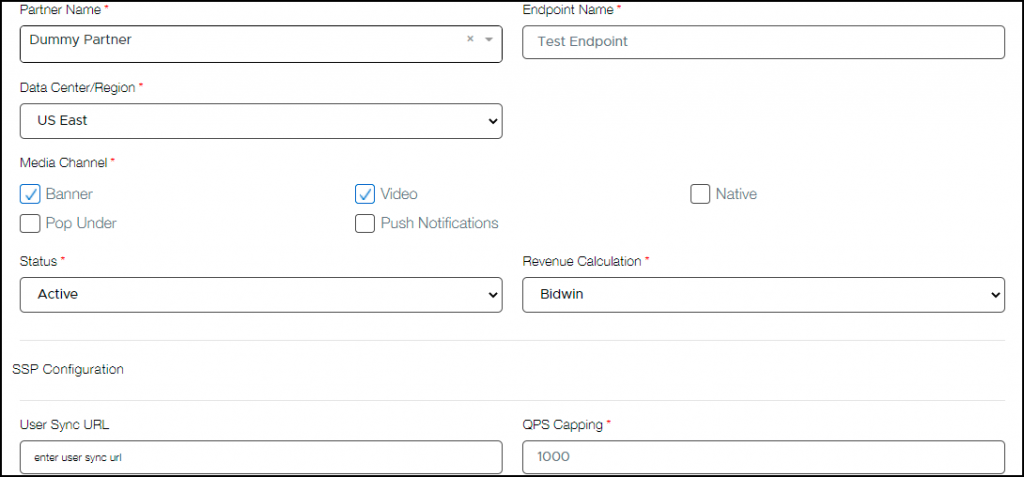
Image 3