
How do I (agency) add/edit the campaign in IngeniousPlex?
Step 1:
- Go to Campaigns from the left navigation bar, select Add New Campaign.
- Select the advertiser for whom you’re creating the campaign and give a name to the campaign. For eg. Traffic_IngeniousPlex (image 1).
- Campaign cannot be created in the absence of the advertiser.
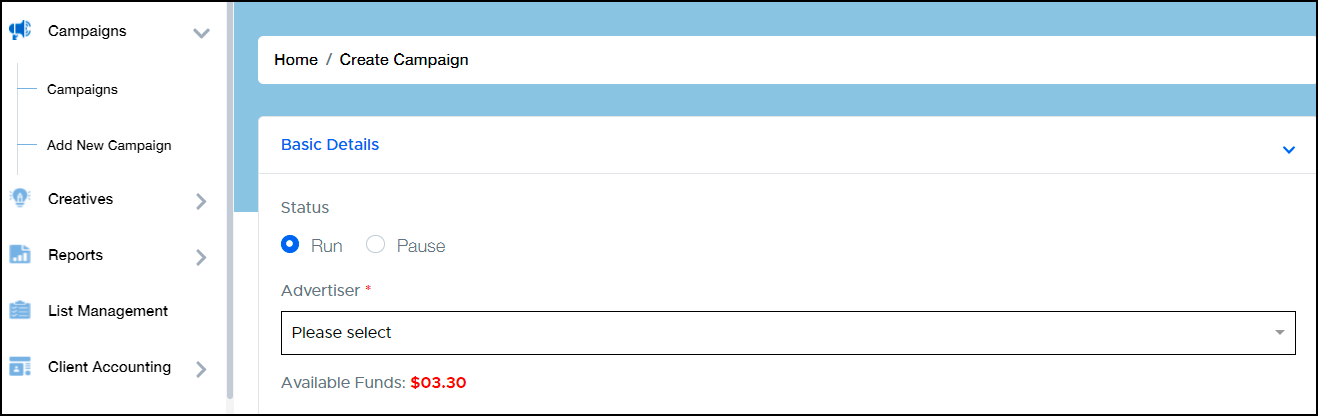
Image 1
Step 2:
- Select the media channel as per your campaign requirements. You can only select one media channel per campaign.
- Now proceed with choosing the device type/s you want the ads to be displayed on along with the environment where the campaign should be launched.
- Select the category of the product or service.
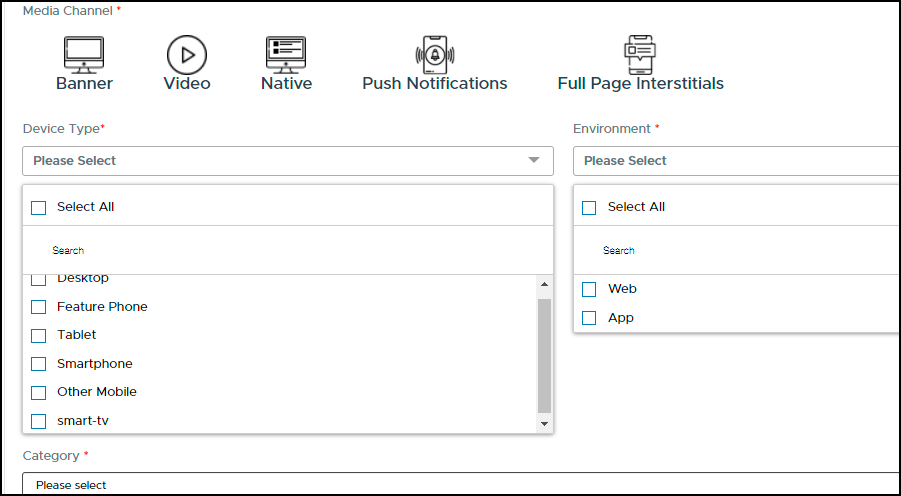
Image 2
Step 3:
- Specify the flight dates, in case you want to define a date when your campaign should be launched. If not, select All Days.
- Select Run Indefinitely if you want your campaign to run until the budget gets exhausted.
- You can also define the time of the campaign by selecting to apply a specific time window across all schedules.For eg. My campaign should run from 14:00 PM to 16:00 PM from the defined start and end date.
- Note that timings are as per the UTC time zone.
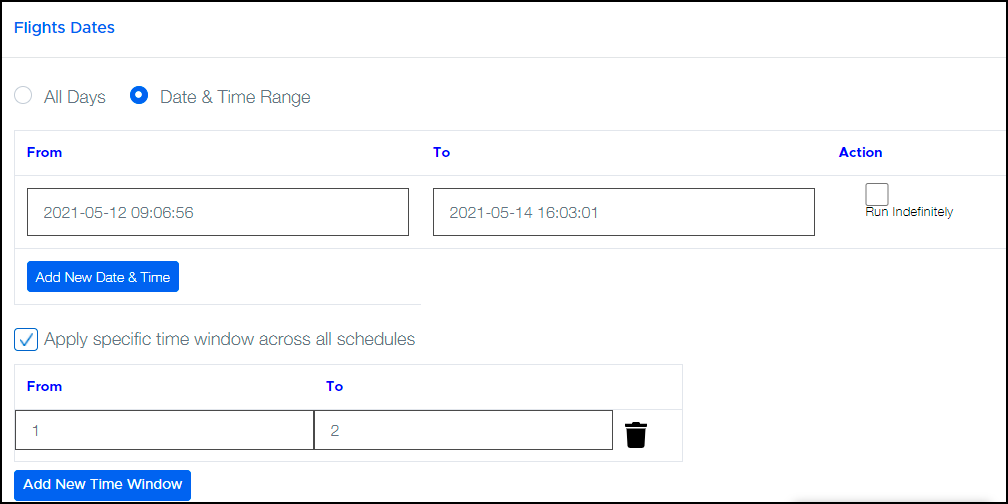
Image 3
Step 4:
- Define the bid set by the advertiser – amount the advertiser is willing to bid for per thousand impressions (CPM).
- Next, add the profit share your agency has agreed to keep in a mutual agreement with the advertiser.
- Now, the amount reflected below will be available for bidding in the auction.
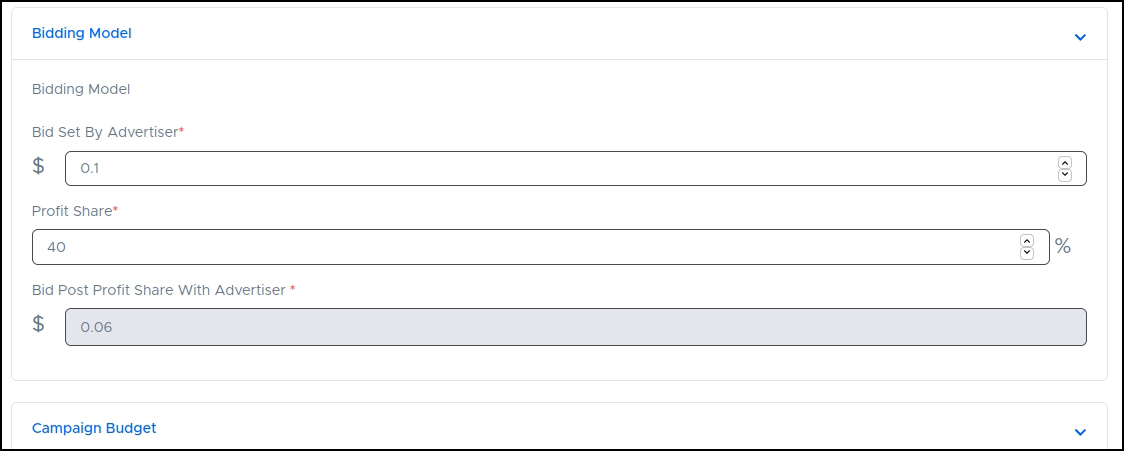
Image 4
Step 5:
- Define the Total Budget you’ve allotted to this campaign for this particular advertiser/client. (Note that the minimum amount to run the campaign is $10)
- Next, you can choose from Accelerated or Standard which means you can have the ads displayed as quickly as possible or steadily and evenly respectively.
- Total Impressions defines the number of impressions that will be served depending on the budget allocated.
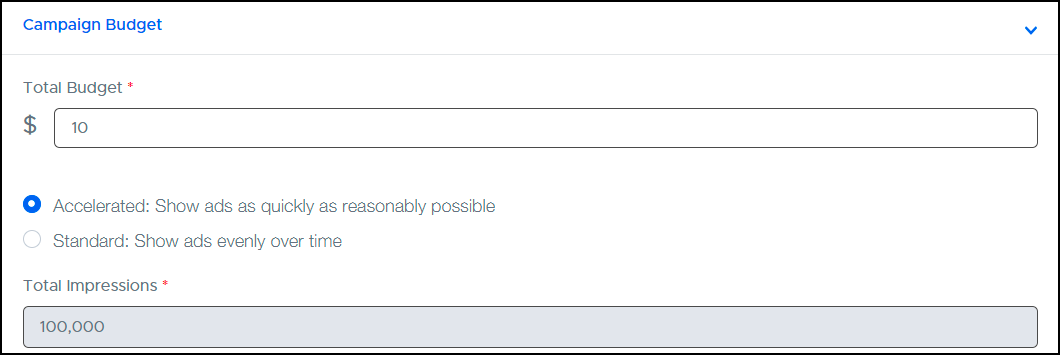
Image 5
Step 6:
- Moving forward, you can choose from Budget and Impressions to set the daily limit if required.
- You can define it per day and even per hour. This will suggest that an x amount from your total allotted budget will be used per day or per hour while the campaign runs.
- Next, you can choose to put the Piggyback pixel that will be provided by your client/advertiser to track impressions on the campaign.
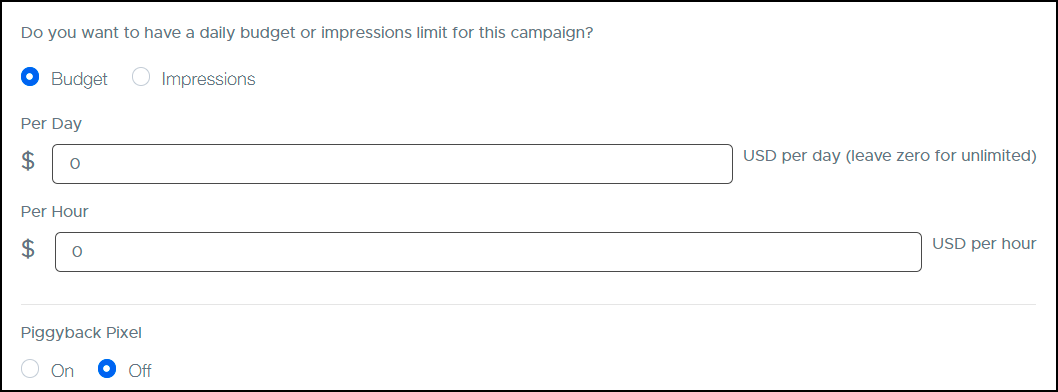
Image 6
Step 7:
- Next, you can choose to track conversions, or even add the list of converted users in case you’ve captured it in the past.
- Such an audience is ideal for retargeting campaigns.
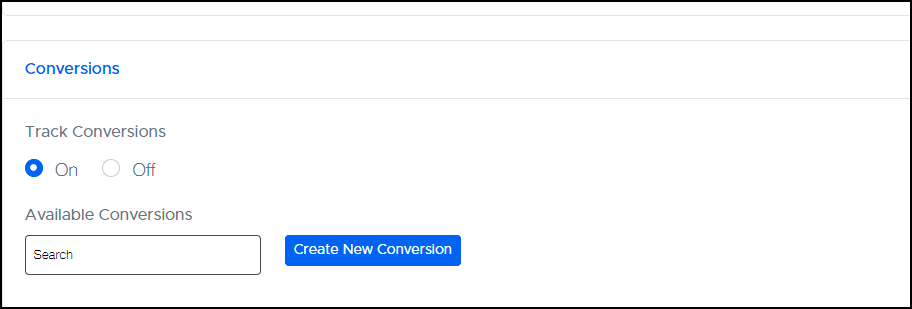
Image 7
Step 8:
- Next step is to add creatives.
- Before which you can apply frequency capping which will define the frequency of the ads to be displayed per user or per hour.
- Now, you’ll be required to add the URL of the landing page where you want your users to be directed to upon clicking. This URL will override the one you will have mentioned in the Creative section.
- Hence, to avoid that, we recommend leaving it blank unless you’re putting the same URL across the campaign.
- Now in TLD, add the main website of the advertiser and not the sub domain. For eg. www.IngeniousPlex.com.

Image 8
Step 9:
- Choose from the targeting options you want to apply for the campaign.
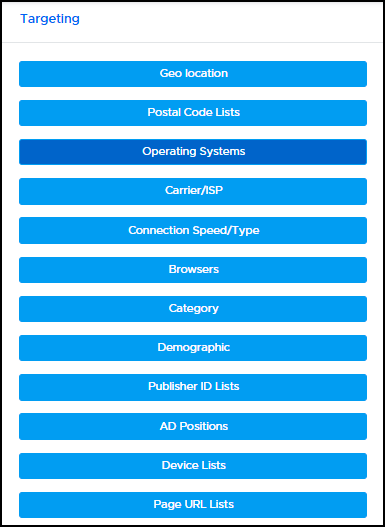
Image 9
Step 10:
- In the next step, enable capturing the audience if you wish so. This helps in retargeting campaigns when you target the audience who had interacted with your ad via clicks or impressions.
- You can also add the audience list here your advertiser might already have.
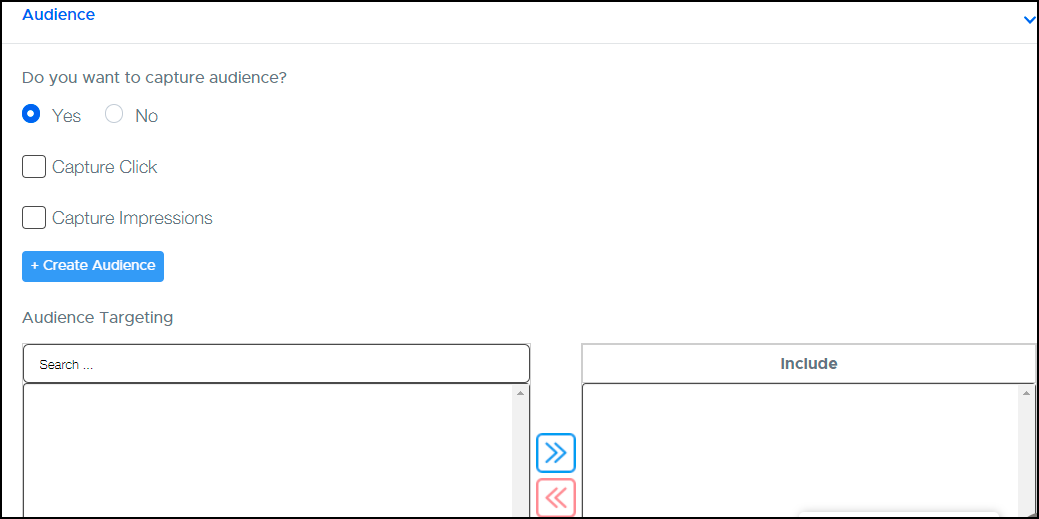
Image 10
Step 11:
- Finally, choose the inventories you wish to place your ads on.
- You can enter a PMP Deal Id in case you’re entering the private auction and have an ID provided by the publisher.
- You can also choose to add a Domain Bundle list here.
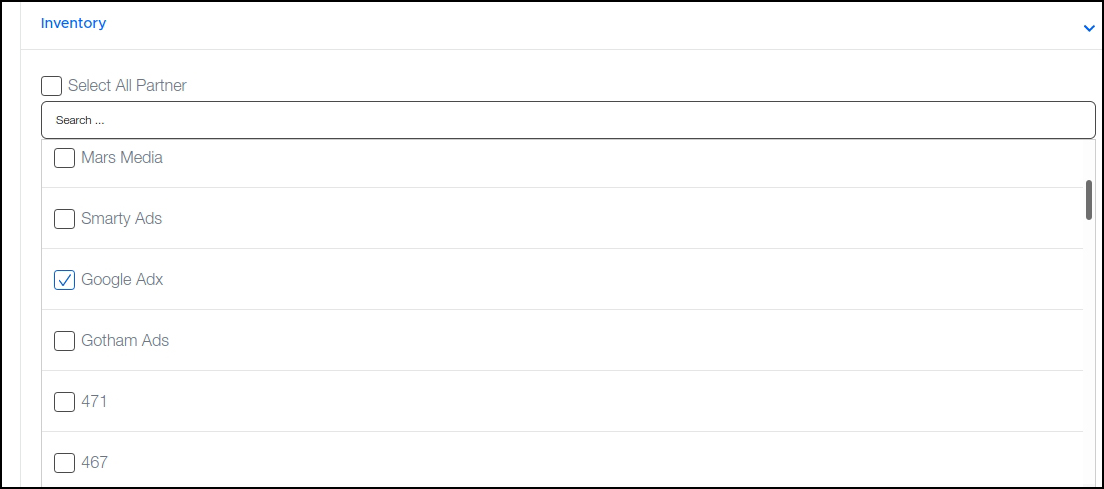
Image 11
If you have any additional queries, please reach us at mktg@ingeniousplex.com.